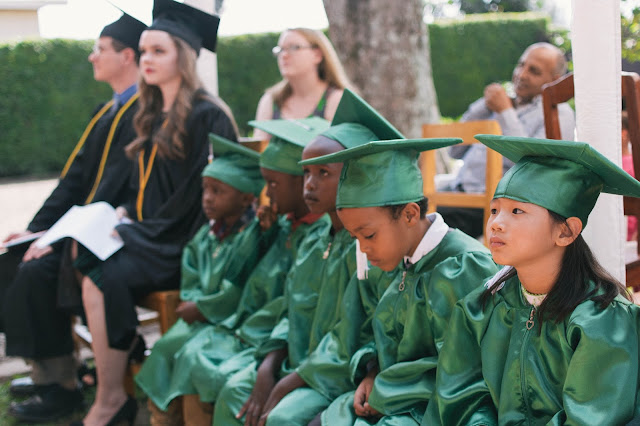
#Graduated
Let's just ignore the fact that we still have a week of school left, and that I'm not actually done with my courses for a sec. Cuz it's time to celebrate! (here's where I would normally insert a little confetti emoji, but alas, this is a blog and not Instagram) I GRADUATED! It actually happened! Woohoo!!
We got to graduate with the five kiddos in our Kindergarten class, and even though it was different, it was also really unique experience. There have been countless times where I wished that I could have had a larger class, or more people my age to be around, but at the same time I have so loved getting to know all of the younger kids at our school this year, and it was just so special to be able to say things to each one of them, and to get little notes from them after the ceremony.
So here's to graduating and adulting and new adventures and all of the other cliche things that graduates usually say.
Let's Party!
A few weekends ago we had a little graduation party for Stephen and me. We brought lights and flowers and candles and glitter jars (DIY for those here if you want some for yourself :) ) and set everything up at a little Italian Restaurant in town. Everyone who cam brought blessings to share, and it was so so encouraging and special to have so many of our loved ones gathered together in one place. We basically spent the whole evening laughing and crying and eating the best Italian food that you've ever tasted. All in all, it was a pretty fantastic night.
DIY Glitter Jars
A few weeks ago, we hosted a little graduation party. I was in charge the decorations (super fun job, BTW), and I decided to make some glitter jars. They turned out so great and are super cute, so I thought that I would do a little DIY tutorial for them here on the blog. Let me know what you think!
What you need:
-Mason Jars (or any type of jar, most of ours were actually just jam jars)
-Mod Podge
-Paint Brush
-Glitter
Step one: Make sure that your jars are clean.
Step two: Using your paint brush, paint a layer of Mod Podge inside of the jar, however far up you want the glitter to go. (We did some of ours all the way up, but also left some only halfway glittered for variation)
Step three: Shake glitter into your jars. You may have to hold them at an angle to get all around the sides. Don’t be afraid to put in too much glitter. You can always pour the extra out and use it for your next jar.
Step four: Once you feel like you have sufficiently covered the jar in glitter, let it dry.
Step five (optional): After it has dried, put another coat of Mod Podge on top of the glitter to seal it. I didn’t actually do this with mine, but I feel like it probably would have been a good idea.
Then you’re done! I put some tea light candles in mine, but you can also just leave them as they are.
Of Friendship and Thankfulness
“What draws people to be friends is that they see the same truth. They share it.” // C.S. Lewis
Today, I’m thankful for friendship.
For friends near and far, old and new, expected, and unexpected. I’m thankful to have people to talk to, people to cry with, and people to laugh with. (that includes you mom) I’m thankful for the people who will Skype with me for hours on end, and for the people who will send me random texts and messages and pictures throughout the week. I’m thankful for people that I can talk to about anything and people with whom I know that I can always be myself.
Most of all though, I’m thankful for Jesus, his provisions, and his unfailing love for me.
What are you thankful for?
A Little Piece of Heaven
Last month, we had some family members come and visit us for a few weeks, and it was wonderful. One afternoon we were all sitting in the yard playing and talking and just enjoying being around each other, and mom later described it as a little piece of heaven in our own backyard. And that’s exactly what it was. It was so refreshing to be able to be around family for a few weeks, and it made me look forward to my gap year even more.


